If we wanted to create a game where our player can jump, run or attack, it has to be programmed but not everyone is a good
friend with programming. Programming in armory3d is done by coding in Haxe. Another way to program our
objects is viusal scripting. You may heard of logic nodes or nodes in general. In this course you will learn how to programm
objects like the player or enemy with logic nodes. For example we want to give our player 100hp and the enemy 75hp
but with a stronger attack. All these things are programmed and controlled in a node tree. A node tree can be created and applied to a object.
To start controlling our player we need to select the player object.
Afterwards we have to create a Trait and then apply the trait to the object.
Now we created a trait for our object but we have to decide what type of trait we want. We can choose over multiple different traits like coding(Haxe) for example but we need to choose Nodes for this course.
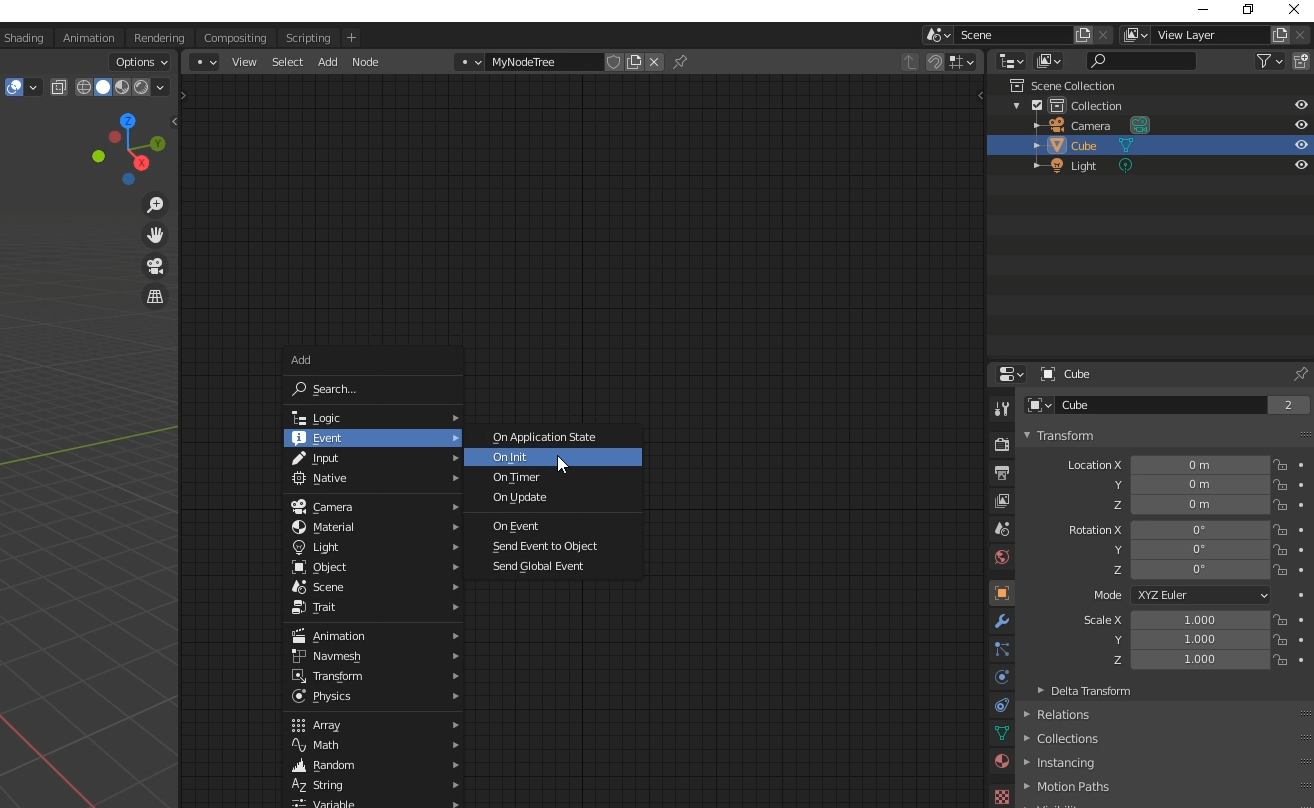
Now that the current object is applied with a node trait we actually have to create a node tree where everything is programmed and controlled. That means we
have to access the node editor to work in there.
Drag from the top right corner a new window and switch it to the node editor.
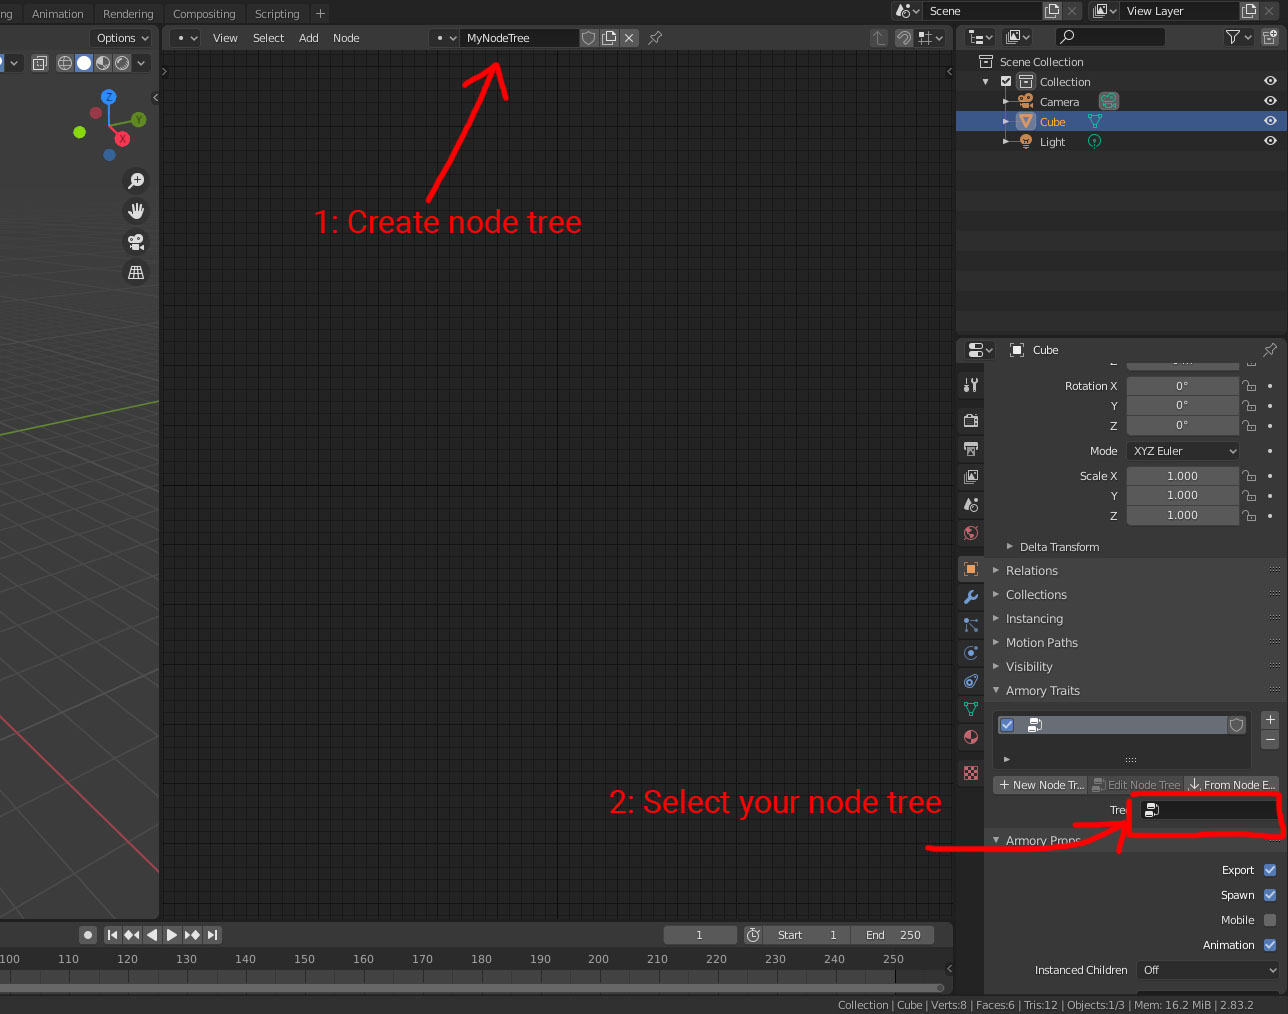
After creating the node tree and giving the node tree a name we can set it to our node trait.
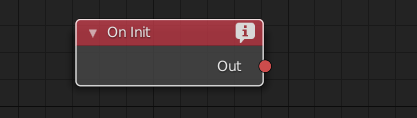
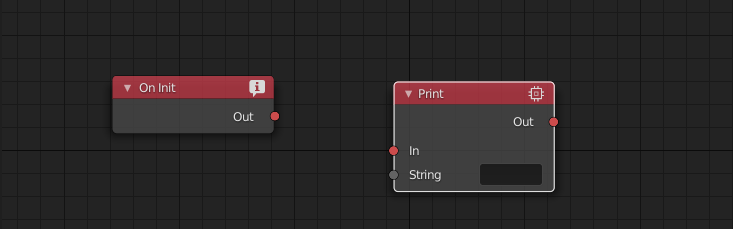
Our current object has now a working node trait!!! So far nothing is happeing because the node tree doesn't do anything. It is empty. In the next chapter we will create our first working node tree!!
We are here and ready to programm our object. As you can see we have on top some links to click. We will mainly use add. You can open the nodes menu by clicking on it.
The other way is to hold shift & A. Now it opens the nodes menu at the mouse position which is a lot more comfortable to work with!
For our first working node tree we want to simply print something out. We have to tell the system when
this should happen, for example in the beginning. In that case we want it at the beginning. For this we have to use
event nodes. We use the on init node event. Everything that is connected to it gets executed at the initalization(Starting point of the game).
Under Event > On init you can add the node. The other way is to open the menu, go to the top and search for the node name.
After you added it you should have something like this:
Now we can connect action nodes to the event node. An action node is a node that is doing something, for example rotating your object. Like I said we will print something to the debug console out. For this we need the print node. Either you search for "print" or go to Native > Print. Now you should have something like this:
As you can see our action node has a red input socket. That means that we can connect the event node to the action node that prints a value out.
Remember: Only action nodes can be connected by a event node!!
> Connect the event node to the action node and then write something in string value input section.
You should now have something like this:
We are now done here in the node tree. Before testing it we have to enable the debug console. In the blender interface go to Render Settings > Armory Project > Flags > Debug Console.
So now we can see the debug console in-game and don't have to do something additional. Start your game with F5 or press the button in the Armory Player.
We can see that we printed something out. Unfortunately we can't see anything. The reason for that is not clear. In the newest armory3d version the unnecessary details of the node tree gets printed as well. Another option is to open the debug console manually by opening it under window > toggle console.
And here we can see our value that we typed in. The print node can be sometimes very useful for getting information from objects and working with them.
Remeber: Make sure that you don't close the console by hitting X on the window. Instead go to window and then toggle it again like you did by opening it!
In the last chapter of the documentation we printed out a value.
In this section we will look what other value types there are. We can print out anything we want to know by just
connecting it to the value input socket. In the area game developement or coding in general you will walk into
variable types.
There are the following basic variable types:
These variable types can be connected to the print, value input socket.....try it!!
> Set a value to the float node for example 45.12 and then connect
it to the print node.
You should now have something like this:
If you now start the game you should get your float output!
As you can see it worked but something is different. Our value in this example was 6.89 but the output is something different. The reason for the long
number is your system. The computer want the number to be exact as possible so its automatically adding additional numbers but don't worry, this does not affect any
object or calculation. You can do that with any variable type!
> For practising purposes you should connect every variable type to see what the output is!!
Integer:
String:
Boolean:
We will have to work a lot with variable types for settings variables and using them.
For example: We want to give the player
health. That means we will use a integer and set it to 100. Additionaly we will set the players life to 3...that means he can die
3 times before the game is over!
In our game we need to decide when our player should move or when the dead enemy should dispawn. All these actions are controlled by
events. We already used the on init one before. Everything that is connected to the on init node gets executed at the
beginning of the game. There are other different event nodes to use.
Please note that we are going to use the very basic ones! We want to keep it simple for beginners.
If you open the nodes menu with shift + a you can go under Event > ... and see every event that we
can use:
We will use the following ones:
On Init: Like you learned in the previous chapters, the on init event node happens at the beginning of the game. That means stats like the player's health or stamina is set to 100 at the beginning of the game.
On Update: The On Update node is in my opinion the most used one! Everything that is connected to it happens once per frame.
That means everything connected to the on update event node happens everytime until the game get shutdown! If you want to rotate an object the whole
time, you need to use this. With the on update node we can constantly check if the player's health is under 1. If so then we should remove 1 life!
You can also
see that you can choose other update types if you click on the box. For now we will ignore them...we will use them in the later chapter's!
On Timer: The On Timer node shouldn't be that hard to understand. If you want to have the node to work you actually need to
set a float value. The value is for the duration time. After the time is reached, every node connected to it gets activated once.
Duration: That means if you have a
value of 0.5, after 0.5 seconds the node gets activated.
Repeat: If the Repeat option is set to true, then every 0.5 seconds it gets
activated.
Now we will use them to test how they exactly work:
On Init
On Update
On Timer:
You really should play with the values and also connect other variable types to have a better understanding how the event nodes are working.